13.0 Edge Match Tool in Plan Creator
Using the Edge Match tool
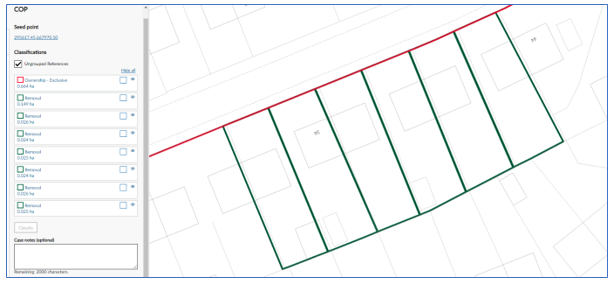
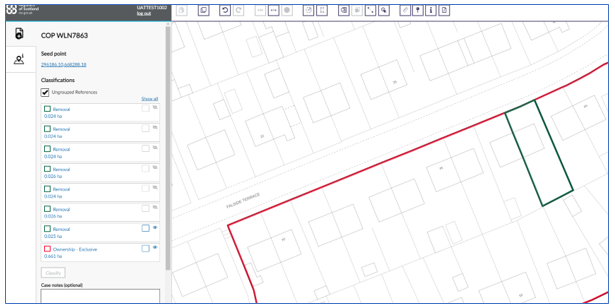
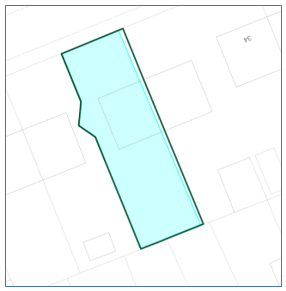
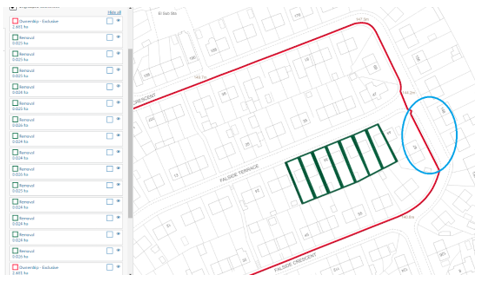
The following example shows a small Parent Title with several green outs, the map has been updated and the polygon extents do not sit on the OS features.
The first step is to use the measure distance tool ![]() on the Plan Creator to check that the adjustment measurement for the polygon to the new OS boundaries is within the tolerance of the base map. This measurement is required for input into the edge match tool.
on the Plan Creator to check that the adjustment measurement for the polygon to the new OS boundaries is within the tolerance of the base map. This measurement is required for input into the edge match tool.
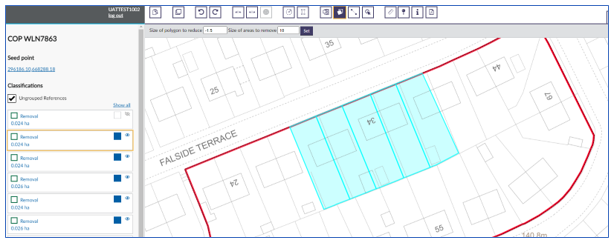
In the following example the map shift is within 1.5 metres. Select the polygon that is to be edged matched, the new edge match tool button  becomes live on the toolbar at the top of the PC.
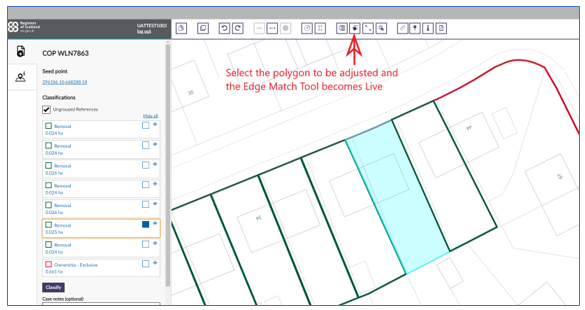
Press the edge match tool button and a selection box appears to set the measurement of the adjustment, shown highlighted in red in the image below.
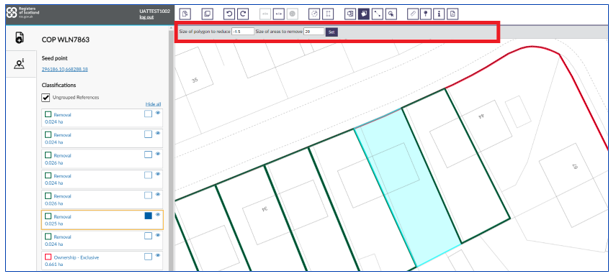
Enter the adjustment figure into the Size of the polygon to reduce box, in this case it is 1.5m.
The Size of areas to remove box is for the area in square metres, so this can be adjusted lower or higher as required. However, the upper limit for the measurement is 20 square metres, anything above this measurement on a polygon should be manually adjusted, see the example at the end of this guidance.
Note The first parameter box effectively helps the tool to work out what underlying OS feature is being snapped to and the second parameter is limiting how much of a map shift is made.
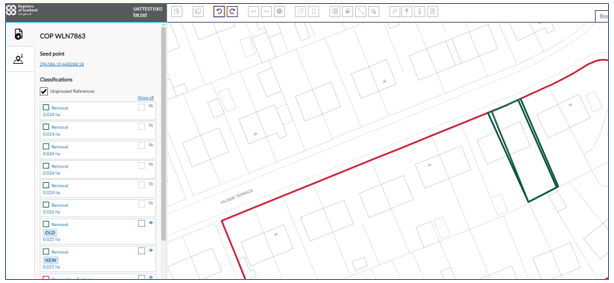
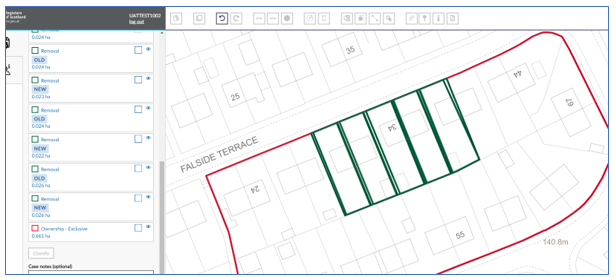
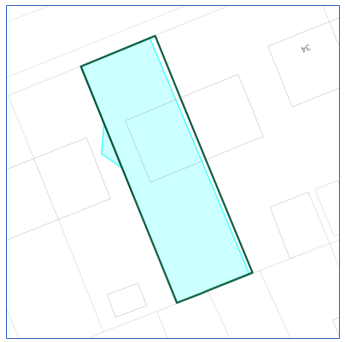
Press the Set button above and the tool creates a new polygon adjusted to the OS features, see image below (please note in the image below, the other polygons have been hidden to better show the edge matched polygon)
The edge matched polygon appears on the left-hand panel with label ‘NEW’ alongside the existing polygon that has just been edge matched, which will appear with the label ‘OLD’ next to it A decision must be made whether the adjusted extent is acceptable or not. If it is acceptable then delete the old polygon and keep the edged matched new one. A check should always be made to ensure that the boundaries have been adjusted as required, this check ensures that the input measurement was correct. If there was an issue, a polygon wouldn’t appear as expected.
Note: When a polygon has been edged matched, the tool bar is greyed out per the image below, this is to ensure that either the ‘OLD’ or ‘NEW’ polygon is deleted before editing can continue. The plan can not be saved until either the ‘OLD’ or ‘NEW’ polygon has been deleted.
Note: When the edge match tool is used, if the polygon has a classification applied this is retained on the 'NEW' polygon.
In the image below, the old polygon has been deleted and the new polygon has been edged matched to the OS features The tool bar has become active again upon a duplicated polygon being deleted and the ‘OLD’ and ‘NEW’ labelling has disappeared.
Adjusting more than one polygon
The edge match tool can also process several polygons at the same time. The procedure above should be followed to ensure that the difference between the existing title polygon and the new OS features is identified. Always check the adjustment figure.
Example, below, of 5 polygons selected for adjustment - the five polygons have been selected and the measurement input into the Edge Match tool
5 new polygons appear next to the original polygons in the left hand panel. Once the 5 old polygons have been checked against the new extents they can be selected for deletion if not required.
Boundaries that are not required to be adjusted within an extent
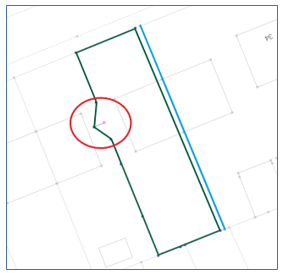
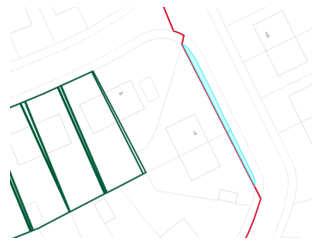
Sometimes there may be extents where boundaries may not be adjusted, In the example below the title should be adjusted to the OS feature highlighted in blue but the jut within the red circle should remain in the same position.
Measure the difference to the blue line, which is 0.61m, also take a measurement to the position of where the boundary could be adjusted to within the red edge which is 1.45m. To adjust the boundary to the blue boundary but retain the boundary within the red the edge match measurement requires to be under the 1.45m measurement.
Measure the difference to the blue line, which is 0.61m, also take a measurement to the position of where the boundary could be adjusted to within the red edge which is 1.45m. To adjust the boundary to the blue boundary but retain the boundary within the red the edge match measurement requires to be under the 1.45m measurement.
A measurement of 0.7m was input and the boundary adjusted.
If a measurement of 1.5m was input the result would be that the two boundaries would be adjusted to the nearest OS feature.
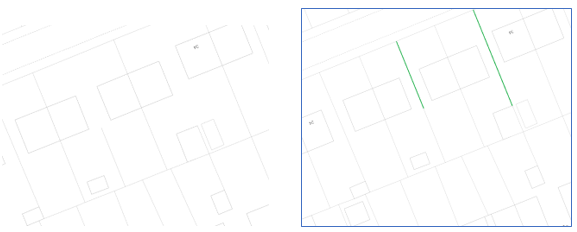
For information, please note that some OS features are not visible, however they are still there for the completion of the polygons on the OS map.
See below where there are areas of the map that look as though the boundaries are incomplete, the position of the boundaries are highlighted with green lines in the second snapshot.
If there was a measurement out-with your tolerance measurement the boundaries would adjust to the nearest OS feature be it visible or not.
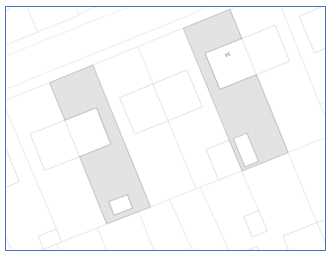
The snapshot below shows the autofill selecting the polygon extent on the map even though the OS boundaries look incomplete.
When the Edge Match tool does not adjust the polygon
There is a situation when the edge match tool does not work, this is when the area being removed is over 20msq, see image below. The only way to update a polygon when it is over the 20msq is by manual intervention.
In the example, all of the polygons were selected for adjustment, the measurement added and the set button pressed. The green polygons were ok and they created two polygons for each extent (an old and a new).
However, the red edge polygon didn't adjust on the eastern boundary, why? Although the gap to the OS feature was just over 1m the overall length of the area took the adjustment over the upper limit of the Size of areas to remove, the upper limit is 20msq. When the adjustment is over the upper limit the Edge Match tool duplicates the polygon but does not adjust to the OS feature.
See snapshot below, there are two red edge polygons shown on the left-hand panel.
In this situation manual intervention is required.
Delete the extra red edge polygon. Autofill the areas that fall within the adjustment to match the OS features and merge the additional areas to the red edge. The polygon has now been adjusted to the OS feature.
Registers of Scotland (RoS) seeks to ensure that the information published in the 2012 Act Registration Manual is up to date and accurate but it may be amended from time to time.
The Manual is an internal document intended for RoS staff only. The information in the Manual does not constitute legal or professional advice and RoS cannot accept any liability for actions arising from its use.
Using this website requires you to accept cookies. More information on cookies.
Feedback