3.0 Plan Creator Layers and Searches
- Editor9
The Plan Creator has three separate layers:

3.1 The Base Layer
This is a copy of the latest edition of the Ordnance map. You can select and copy polygons from this layer on to the edit layer. This layer is automatically selected when you have created your DCU or COF.
3.2 The Index Layer
The index layer on the Plan Creator works in exactly the same way as the index layer on the Plan Viewer. You can search in three ways, and view titles, indexes, draft titles, etc.
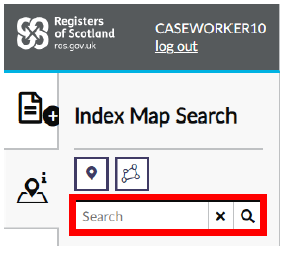
3.2.1 Specific search
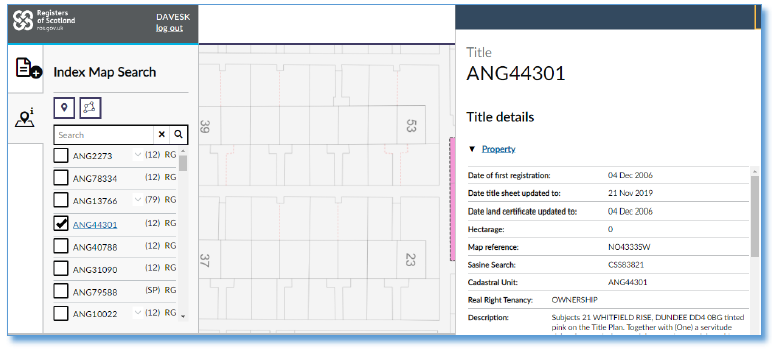
Search for a particular title or index by filling in the search box - if a valid title number or index is entered, it will be displayed on the main screen.
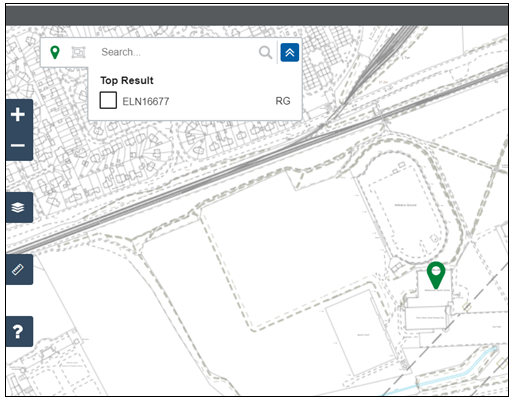
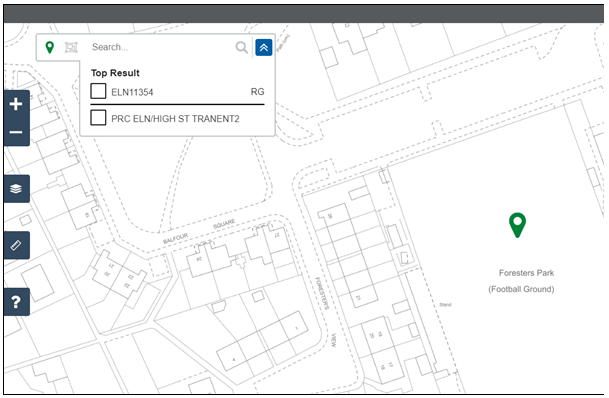
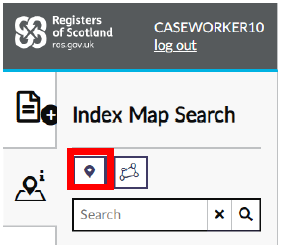
3.2.2 Point search with Top Result
Search a point on the map by clicking the point search button, then clicking on the area of the map you wish to interrogate.
The titles that are classed as Top Result will be displayed above a dividing line. Titles classed as Top Result are those that include the smallest polygon sitting under the search point dropped on the map canvas.
These results are ordered by newest title number first.
All other search results continue to be displayed below the dividing line.
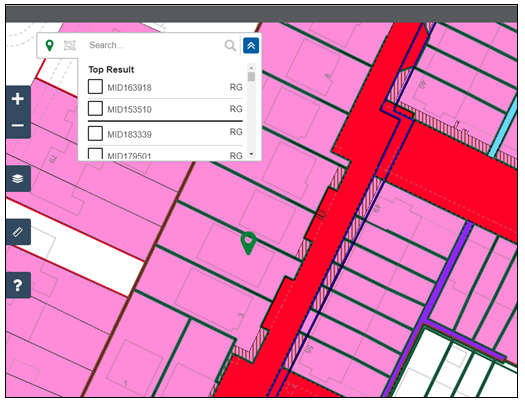
If the search only returns a single title, this is still presented as Top Result.
Indexes will continue to be presented below titles and will not appear as part of the Top Result list.
You can select a title or index from the list to view by clicking in the box to the left of each of the title numbers, etc. and that title or index will be displayed on the main screen.

The title number, etc will turn into a link (the text will be blue & underlined) when you have selected it. If you click on that link, the title sheet will be brought up in the right hand panel. This will also show a reference legend if that particular title was created in the Plan Creator.
Please be aware of the following when using point search and interpreting the Top Results:
- Tenement steadings: as these are not always duplicated polygons, the tenement steading extent for titles in the same tenement may not be mapped exactly the same – in this instance, only those titles in the same tenement steading with the smallest tenement steading area will be shown as the Top Result.
- Flatted properties: if the search point is dropped on an area of servitude/burden or exclusive/shared ground, only the title(s) that contain these polygons will be shown as the Top Result.
- Shared roadways: as with tenement steadings, only those titles with the smallest roadway area will be shown as the Top Result.
A full investigation of all search results is still best practice in all cases.
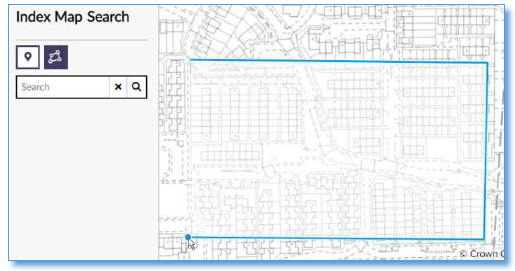
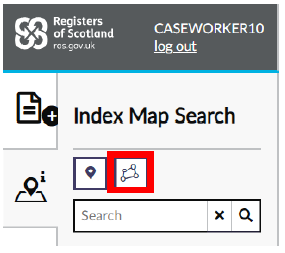
3.2.3 Area search
Search an area of the map by clicking the area search button, then using the left mouse button to click on the corners of the area you wish to search. Double left-click on the final point of your area, or click on the first point again to start the search.
When completing an area search, a list of all titles, indexes, etc. will be display in a list under the Index Map Search box. You can select an item by clicking in the box to the left of each of the title numbers, etc. and that title or index will be displayed on the main screen.
The title number, etc will turn into a link (the text will be blue & underlined) when you have selected it. If you click on that link, the title sheet will be brought up in the right hand panel. This will also show a reference legend if that particular title was created in the Plan Creator.
Previously searching by area search returned all intersecting polygons that affected the selected search area - the function has now been enhanced so the search also returns results where a line or point intersects with the search area.
Please note that old DMS labels are not returned in these results.
3.3 The Edit Layer
This is the layer within which you create the cadastral unit by copying polygons from the Base and Index layers and editing them as required.
You can switch between the layers at any time, but can only access the edit layer once you have copied polygons through from the Base or Index layers.
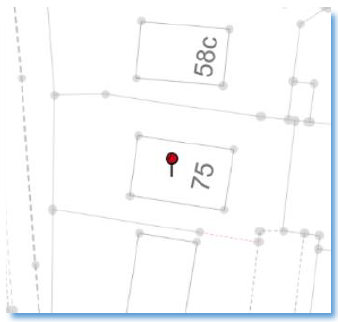
3.3.1 Vector Points
While on the edit layer, you will encounter three types of points all with different colours:
| OS map points - grey |
| These points appear when:
|
| Polygon points - blue | 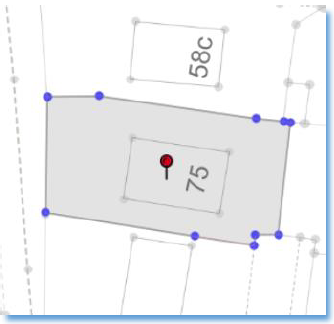 | These points appear when:
|
| Construction points - pink | 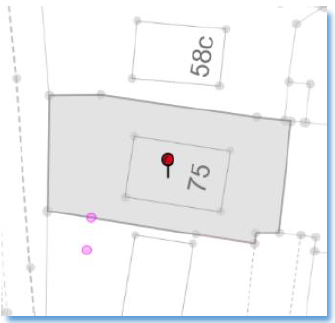 | These points appear when:
|
In the bottom right corner of the screen you will see

or

The pink construction points are only selectable when you activate “Construction Point Snapping ON”. To toggle between the two settings, a hotkey has been set up - hotkey ‘S'. With this key you are able to toggle between the pink construction points and the grey/blue OS/polygon points as required.
When Construction Point Snapping is OFF, you can ONLY snap to the blue or grey points.
When Construction Point Snapping is ON, you can ONLY snap to the pink construction points.
If the blue polygon points do not appear automatically when you start working, then use the 'S' hotkey to force them to show.
3.4 View Layers Panel
If you want an overview of the entire Cadastral Map and index layers without using the point or area search tools, you can do this by clicking on the “View Layer Panel” button located on the right hand side of the screen.
This will give you the option to view all titles, indexes, draft plans, County Series maps, and the aerial photography of the area of the map shown on the main screen. Click in the box next to the ones you wish to view, and they will be displayed on the map.
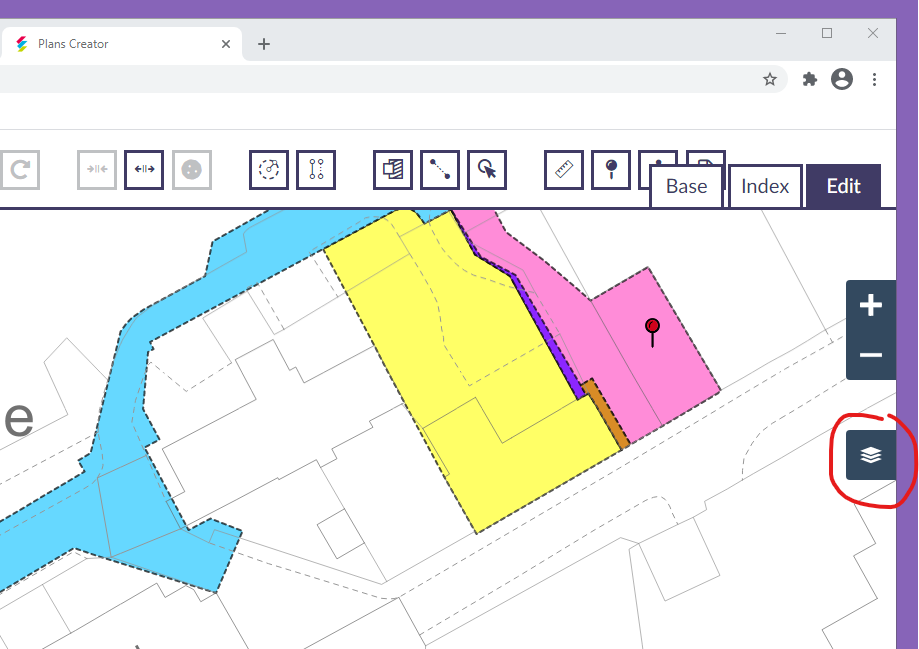
There are sliders to change the opacity of the layer so that you can view any layer that is being hidden underneath.
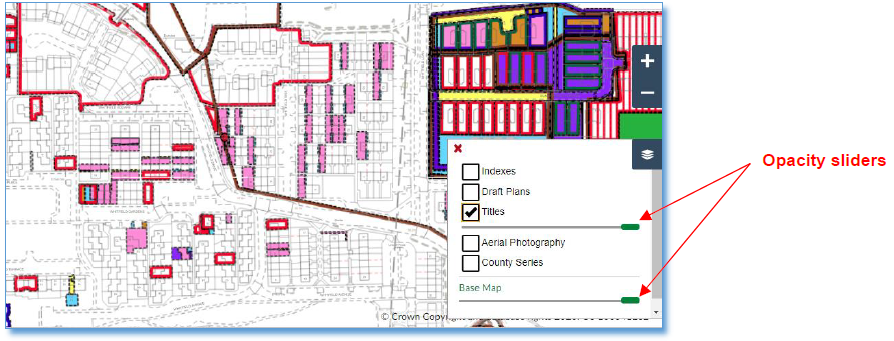
Please note, you cannot select polygons to copy into the edit layer when viewing from the View Layer Panel, as this is purely an overview of the cadastral map and other layers, etc. It is for viewing only, but it is a useful tool for allowing an overview of the area you are working in to help you see what may affect your cadastral unit, etc.
You should use the search functions described above (specific, point, or area) if you need to copy or interrogate any titles, indexes, etc.
Registers of Scotland (RoS) seeks to ensure that the information published in the 2012 Act Registration Manual is up to date and accurate but it may be amended from time to time.
The Manual is an internal document intended for RoS staff only. The information in the Manual does not constitute legal or professional advice and RoS cannot accept any liability for actions arising from its use.
Using this website requires you to accept cookies. More information on cookies.
Feedback