6.0 Plan Creator Groupings
- Editor9
6.1 Creating a grouping
To create a grouping, while classifying a reference that you know will need to be on a different layer simply:
| a. Click on the Assign to group field. |
|
| b. Select the appropriate group. | 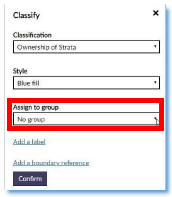 |
| c. Click Confirm. | 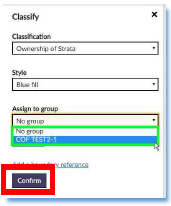 |
| d. A new group/layer will be created with the reference in it. | 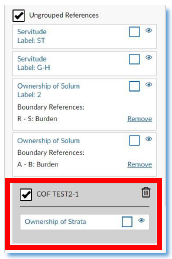 |
6.2 Add further references to an existing grouping
If you wish to add a reference to an existing group/layer, then:
| a. Select your reference, and complete the fields within the classification menu. |
|
| b. Click on the Assign to group field. | 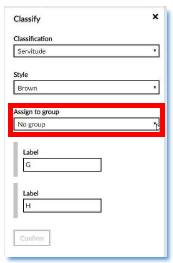 |
c. Select the required group (as you can see, a new group name is selectable as well as the existing one). Click Confirm. | 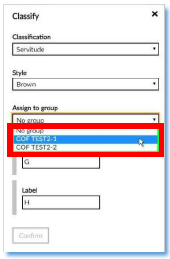 |
| d. The reference is then placed within the chosen group. | 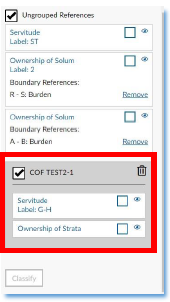 |
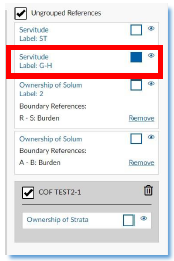
6.3 Moving references between groupings
Moving a reference to another group or to put it back in the "Ungrouped" layer is straightforward.
a. Select the reference you wish to move. Click Classify. |
| |
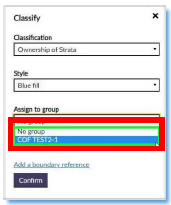
b. Select No Group to move the reference back to the ungrouped layer or Select another group to move it to that layer. | 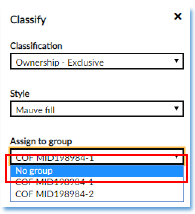 | 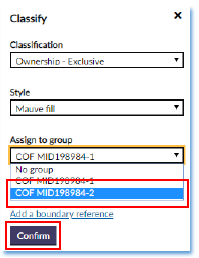 |
| c. Click Confirm. | ||
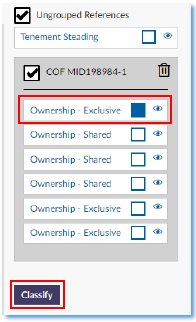
6.4 Deleting a grouping
a. To delete a group, just click the trash can icon in the panel | |
| b. A pop-up window will appear warning that this action will delete ALL references in the group. | 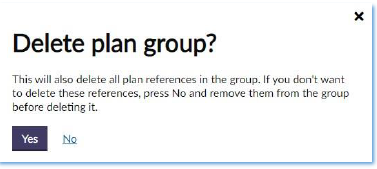 |
c. If you do not need any of the references, click Yes. However, if you need some or all of the references then click No. The needed references can then be manually moved to a different group/layer before this group is deleted. | |

Registers of Scotland (RoS) seeks to ensure that the information published in the 2012 Act Registration Manual is up to date and accurate but it may be amended from time to time.
The Manual is an internal document intended for RoS staff only. The information in the Manual does not constitute legal or professional advice and RoS cannot accept any liability for actions arising from its use.
Using this website requires you to accept cookies. More information on cookies.
Feedback